Using the Agent Activity Report
The following describes how to access and interrogate the Agent Activity report, which provides a summary of activity for one or more Agents during a specific period. Each activity will be sorted chronologically by start time, with the earliest event appearing at the top.
If you aren't sure where to begin with this report, you can quickly generate an activity summary for either an Agent or a call as follows:
-
Agent: From the Agent's Details page, click the Agents Activity Diagram hyperlink. This report will summarise all of the Agent's activity over the past 24 hours.
-
Call: From the call's Details page, click the Agents Activity Report hyperlink. This report will summarise all Agent activity related to the chosen call for its duration.
Whether you use a preset or create a bespoke summary, you'll be able to modify the report's parameters to include more or less information, as required.
Implementation
- Access the Call Log page.
 How do I access the Call Log for today?
- Hover over your company name in the top-left corner of the screen to reveal the context menu.
Click Call Log for Today. This opens the Call Log screen, with call totals for the current date selected.
- Use the Show Me drop-down to select Agents Activity.
- Use the For... drop-down to select the category of calls you want to include in the report. Depending on your choice, you may be presented with additional drop-downs to further specify the calls you're interested in.
- Use the On... drop-down to report on one of the following:
- All calls for your organisation.
- Inbound calls for your organisation.
- Calls specific to a single organisation.
- Calls specific to a single service or number.
- Calls specific to a single Agent.
- Calls specific to an Agent group.
- Use the Over... drop-down to choose the reporting period, which can be a single day, month, or year; a certain period in the past (e.g. last 7 days); or a specific date range.
The maximum date range for this type of report is three months.
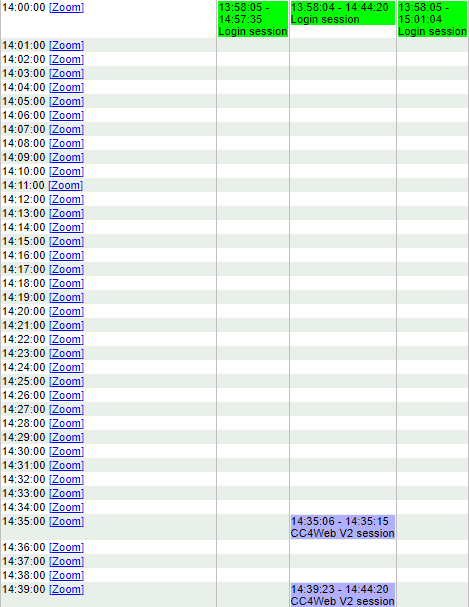
- The Display Row Type drop-down determines how compact the information in this report will be. By default, this is set to One Row Per Activity, although certain presets may change this to include more detail.
 One Row Per Activity...
If this option is chosen, each activity will be shown as a single block, displaying its start date and time together with its end date and time. This means that login sessions will appear as single items, and any activities that occurred during those sessions will also appear as single items, but after the respective login session block rather than inside it.
 Rows for Starts and Ends; Empty Space Removed...
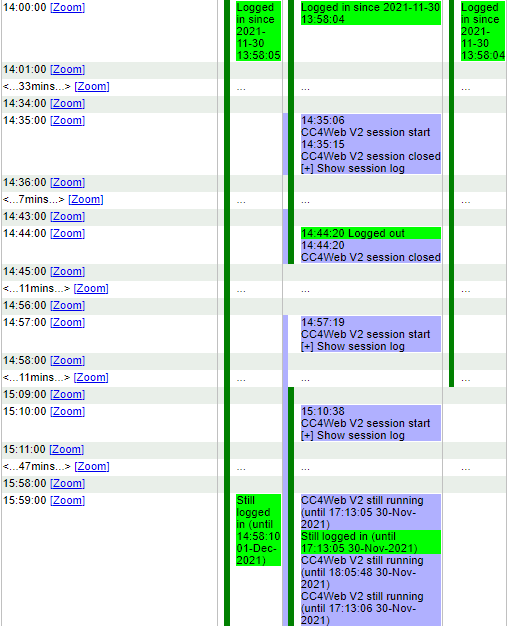
If this option is chosen, each activity will be shown as separate start and end blocks, with each block showing the date and time at which it occurred. Any activities that occurred as part of another one (e.g. a login session may include at least one instance of logging into the Cxp Agent Experience) will be shown encapsulated between the start and end of the wider activity, making it clear where how these events relate to one another.
Selecting this option will also cause any time in which no changes in activity occurred to be condensed, reducing empty white space.
 Row for Starts and Ends; All Times Shown...
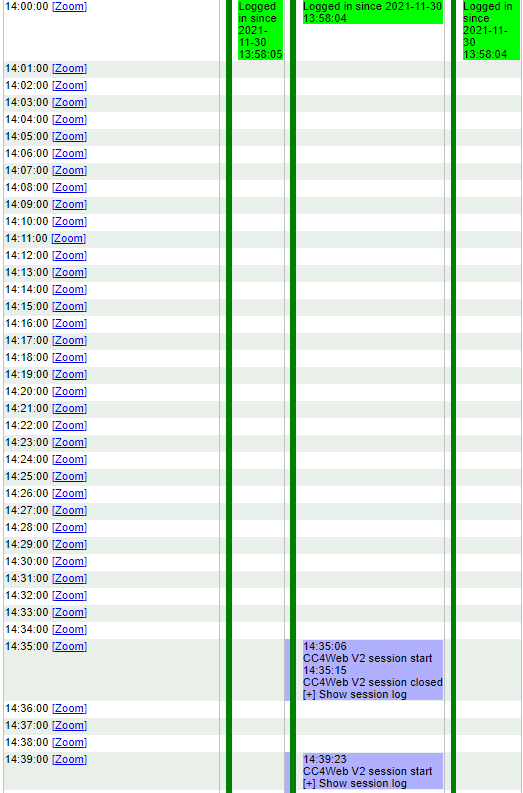
If this option is chosen, each activity will be shown as separate start and end blocks, with each block showing the date and time at which it occurred. Any activities that occurred as part of another one (e.g. a login session may include at least one instance of logging into the Cxp Agent Experience) will be shown encapsulated between the start and end of the wider activity, making it clear where how these events relate to one another.
Selecting this option will also cause any time in which no changes in activity occurred to be included in the report as empty white space.
- Depending on the size of the period to be covered by this report, you may want to view the contents at a fine level of detail (e.g. second by second), a top-level overview (day by day) or somewhere in-between. Use the Detail / Scale drop-down to choose your preferred level, or leave it as Auto Scale if you want the system to choose a level appropriate for the reporting period.
You will have the option to zoom in or out as needed after generating this report, as needed.
- By default, the report will only include Agents with some form of activity during the specified period. If you want to Show Agents with no Activity During this Time, tick the corresponding check box.
- If you want the report to only show activity relating to specific calls, type the corresponding call IDs into the Display Specific Call IDs field, separating them with commas e.g.
00001,00002,00003. - If you want the report to only show activity relating to specific Agents, type the corresponding Agent IDs into the Only Show Specific Agents IDs field, separating them with commas e.g.
777777,888888,999999. - If you want the report to only show activity relating to a specific session, type the corresponding session ID into the Show a Specific Web Session ID field.
This field defaults to 0, which causes all sessions relevant to your other search criteria to be included in the report.
- Click Update to display the report based on your choices.
- After generating the report, you can dynamically expand the reporting period by clicking one of the Also Show... buttons in the report header.
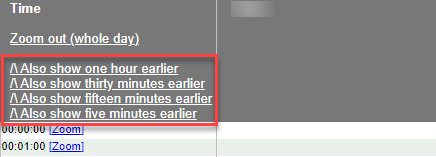
Since the maximum scope of this report is three months, if you try to extend yours beyond that, you will receive an error message.
- If you are not at the minimum zoom level (day at a time), the report header will also include buttons that let you Zoom Out to a lesser magnitude.
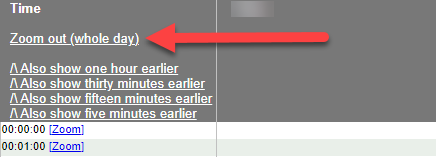
- If you are not at the maximum zoom level (second by second), each time interval in the report will include a Zoom button, which you can use to magnify the report to show that interval in more detail.
